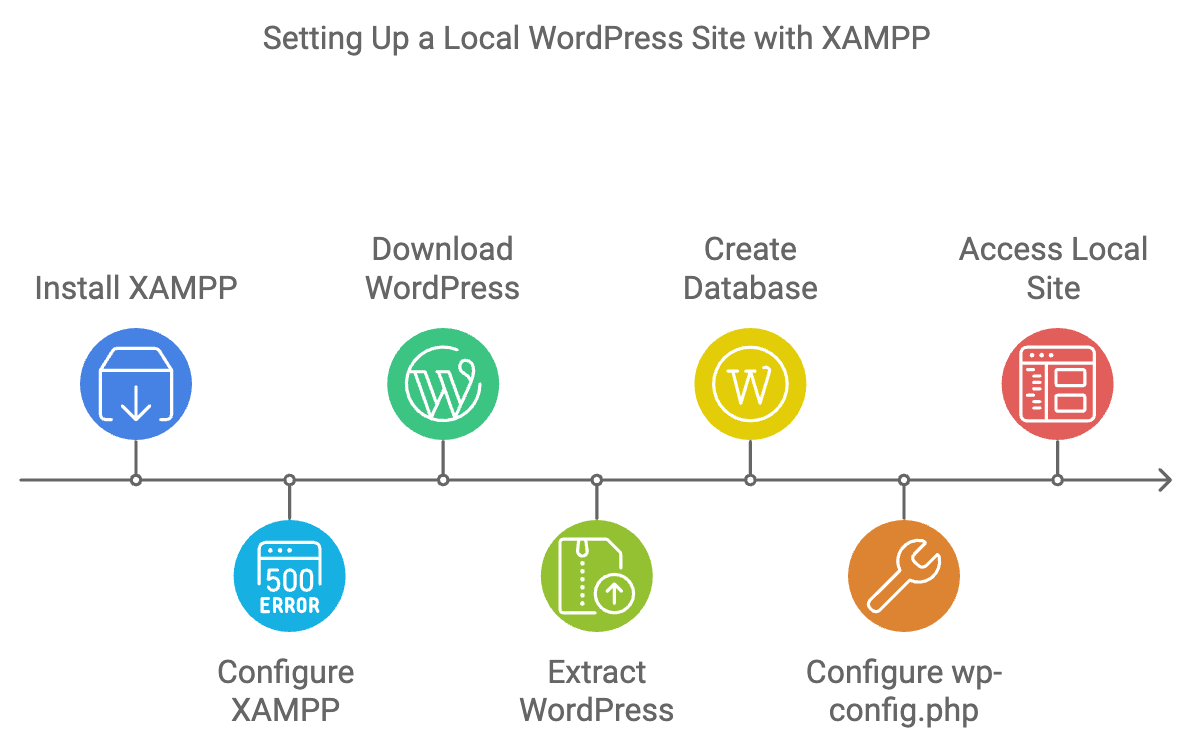
How to Create a Local WordPress Site Using XAMPP
Creating a local WordPress site is an essential skill for web developers and businesses looking to enhance their online presence. This article will guide you through the process of setting up a local WordPress environment using XAMPP, a free and open-source cross-platform web server solution.

Why Create a Local WordPress Site?
Building a local WordPress site allows you to develop and test your website without the pressure of going live. It provides a safe space to experiment with design, plugins, and themes, ensuring that your site is polished and functional before it reaches your audience.
What Is XAMPP?
XAMPP is a powerful tool that combines Apache, MySQL, PHP, and Perl into a single package, making it easy to create a local web server on your computer. It simplifies the process of running web applications, such as WordPress, directly from your desktop.
Installing XAMPP on Your Computer
To get started, download the XAMPP installer from the official website. Follow the installation instructions for your operating system, and ensure that all necessary components are selected during setup. Once installed, launch the XAMPP Control Panel to manage your server.
Creating a Local WordPress Site With XAMPP
Step 1: Download and Install XAMPP
Begin by downloading XAMPP from the official site and running the installer. Follow the prompts to complete the installation.
Step 2: Start XAMPP and Test the Connection
Open the XAMPP Control Panel and start the Apache and MySQL modules. Once they are running, test your server by entering http://localhost in your web browser.
Step 3: Add the WordPress Files
Download the latest version of WordPress from the official website. Extract the files and move them to the htdocs folder in your XAMPP installation directory.
Step 4: Create a Database for WordPress
Open your web browser and navigate to http://localhost/phpmyadmin. Create a new database for your WordPress site to store all your site’s content.
Step 5: Install WordPress Locally
In your browser, go to http://localhost/your-wordpress-folder. Follow the on-screen instructions to complete the installation, entering your database details when prompted.
Things to Try After Creating a Local WordPress Site
After setting up your site, explore various themes and plugins. Customize your site’s appearance and functionality, and consider creating a staging environment for testing new features before going live.
Bonus: Moving Your Local WordPress Site to a Live Server
Once you’ve perfected your local site, you may want to move it to a live server. This process involves exporting your database and transferring your WordPress files to your hosting provider.
Expert Guides on Local WordPress Sites
For more in-depth information, check out expert guides on managing local WordPress sites, covering advanced topics such as multisite configurations and troubleshooting common issues.
Our Services
At Versatel Networks, we specialize in selling user-friendly WordPress websites tailored to meet your business needs. Our services include:
- Custom WordPress Development: Building websites from the ground up to ensure they meet your specifications.
- Theme Customization: Modifying existing themes to reflect your brand identity.
- Plugin Integration: Enhancing your website’s functionality with the right plugins.
- Ongoing Support and Maintenance: Offering continuous assistance to keep your site running smoothly.
Whether you need a simple blog or a complex e-commerce platform, we are here to help you succeed online.
In Summary
Setting up a local WordPress site using XAMPP is straightforward and provides a valuable opportunity to develop your website in a controlled environment. By following these steps, you can create, test, and refine your site before launching it to the public.